If You Are Going To Play In A Key Every Day, Shouldn't You Learn That Way?
Yes, you should!
Music is key based. You are always in one key or another. Always!
Yet playing a guitar is not taught that way! Why?
Once you understand keys and the chords and scales that come from keys, the whole world of music opens up before your eyes!
Suddenly everything is MUCH easier. And it totally makes sense when you get into it.
For $15, you can put this all to rest right now. Pick up a copy today.
eBooks are delivered instantly!
Considering the differences between an acoustic guitar and a classic guitar, it is no wonder I keep getting questions about how to set up a classic guitar. So I am writing a quick article outlining how to do it.
Before you begin, I suggest you invest in a few tools. These tools will help you do the job correctly which may translate into a better and quicker job.
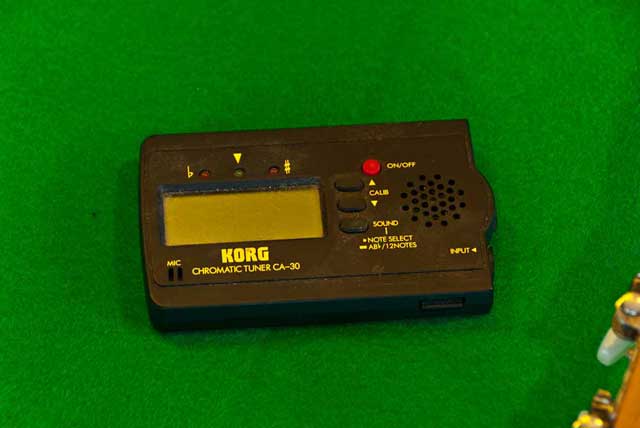
Guitar Tuner. This little tool will take al the guess work out of tuning your guitar once you get the strings on. This is the one I usually use, however, these days every piece of electronics has a tuner on it, so you what you have.
Remember that the strings will stretch a little over the first few days, so retuning is necessary.

String Winder. This tool will wind the excess string up on the tuner. It is one of the best tools I have and I use it every time I tune. This particular winder I have had for over 30 years.
I keep this in my guitar case with my tuner, 30 or more picks, extra strings and a capo.

Wire Clipper. Yes I do carry one of these with me when I think I might need to change strings. It is not kept in my case.
This clipper will keep your strings nice and tidy and you can make short work of taking off old strings.

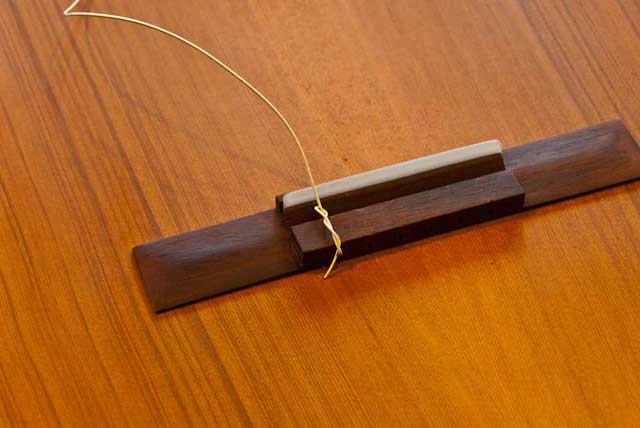
This is what the bridge looks like on a classic guitar. Notice how the strings are placed through the bridge and then tied off in a casual knot?
These strings are not consistantly strung the same way and you can see this as you look. I perfer to string them all the same so you can easily tell if one of them is slipping just by glancing at them. This way you are never sure. But also notice that the wide variety of ways this guitar is strung alludes to the fact that most stringing methods will at least keep the strings attached to the bridge.
This is where we start to restring this guitar.

This is what the headstock looks like. Notice you wind the string around the round cylinder after you thread the string through it. We will look closer in just a few images.

So now we get to the point where we start cutting off strings. But think about this for a minute. There are over 400 lbs of pressure on these strings. If you just go cut one, there will be some stress placed on the guitar. Better to unwind them slightly before cutting. Then there is basically very little stress involved.
When guitars get old they can become more fragile, so being a little more careful may pay off.

I suggest starting with the low E string and then cut the high E string. Then repeat with the A and B string and finally cut the middle two strings off.
Do not start stringing the new strings until you cut off all the old strings first.

This is what a string looks like after you remove it from the package. Notice this one is labeled as an E string so you do not put it in the wrong place.
Now the first E string has been threaded through the bridge and tied up. There is no pressure on this string yet because the other end has not been threaded and tightened.
When I am done, every string will look like this one.
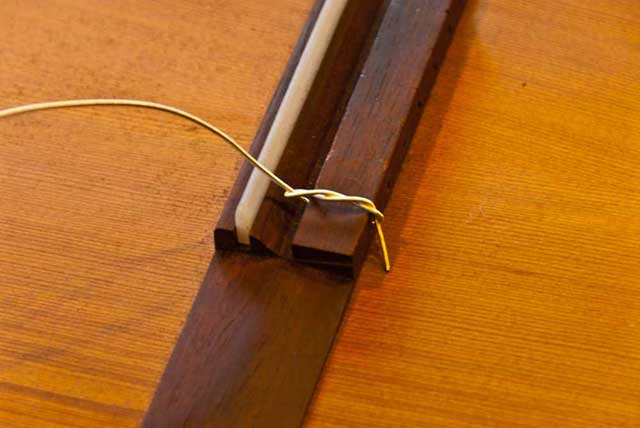
Here is another look at this knot from a different angle.

Now you can see all we have done is fasten the string to the bridge

In this image I am attaching the string to the tuning peg. Notice the string is pinched under the string as it is wound. This will help keep it in place. This is the same winding as for acoustic pegs, just modified for classic tuning pegs.
Do not tighten any of the strings beyond snugging them up to get the slack out of them. After they are all on, then you can begin to tighten them up.
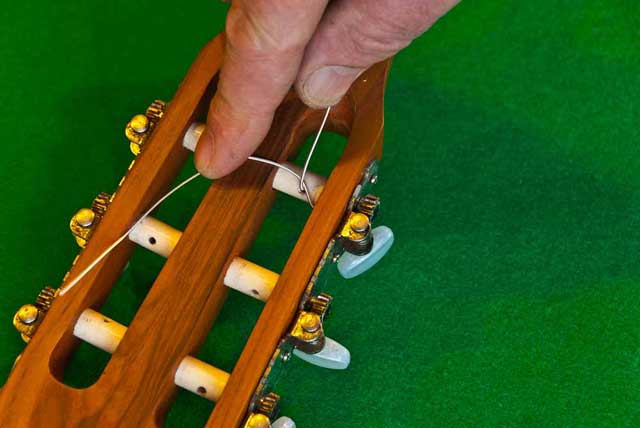
This image shows my technique for holding the string down while I tighten the tuning pegs.

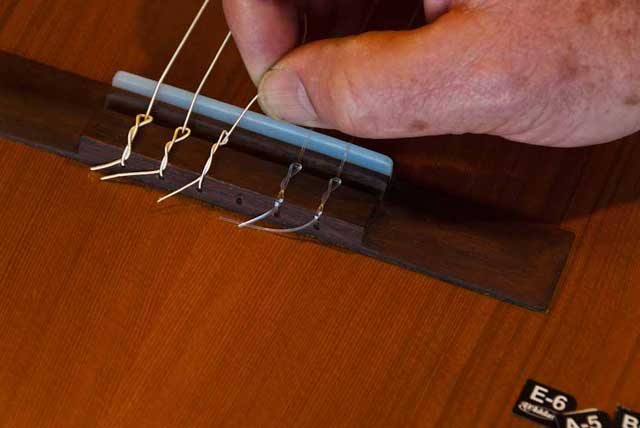
Here you can see I have two strings on now. Notice the string labels are right next to the strings.

Both strings are attached to the tuning pegs now. The clear string is harder to see but it is the same as the low E string, just opposite since it is on the other side of the guitar.
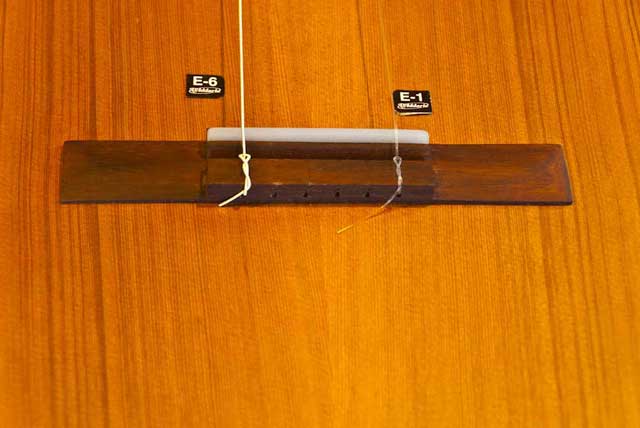
Now you can see both strings are in and the labels are next to the bridge.
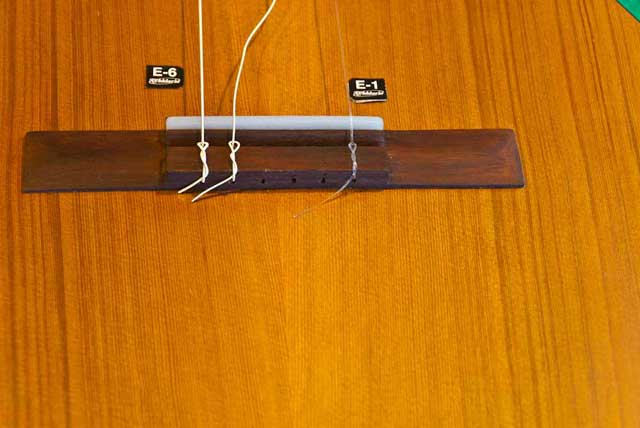
The A string is next and it is wound through the bridge and tightened down.

Now the A string is wound around the tuning peg and all the slack is taken out of the string. Remember to not tighten them too much yet. Wait to get them all in place first.

Now the D string is threaded through the bridge. Notice you can see how the string flows through the hole. The following images will show you exactly how to tie the knot.

Hold the string up and pull it to the aproximage position.
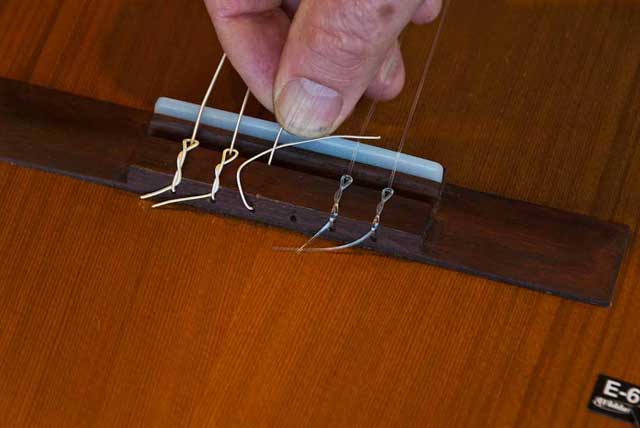
Now take the tag end and wrap it around the held string and then through the loop you just created.

Pull the tag end through the loop and repeat.
Once you wrap the string around itself as shown, you can pull a little on thestring to tighten the knot up a little. It will get much tighter as you turn the tuning pegs.

Now all six strings are in place. Notice they are all tied the same way and you can easily see if one is tied incorrectly or has slipped.
If you put a string in the wrong place, not only will it feel wrong, it will be almost impossible to tune correctly. Be careful to get the strings in the proper order.

Once the tuning pegs are all threaded, it is time to slowly tighten the strings. Start with the low E string and slowly bring it up to proper tension. Start up your tuner so you will know when you are getting close and to make sure you do not over tighten the string.
You will need to play the guitar to get the strings to help their tunning, but after a few hours of play, this will go away.
That's it!
Home | FAQ | Purchase | UTFY | UTBB | UTBC | Tools | Flash Scales | Flash Chords | Video Scales | Newsletter | Reader Comments | About Us | Guitar Lessons | Teaching Center | eBooks | String a Guitar | Quick Guides | Search | Contact | Privacy Policy | Guarantee | Links | Login | Help Desk | Site Map
